Updated July 6, 2026 · 8 min read
By Boise Bath — bathroom & shower remodeling in Boise & the Treasure Valley
The short answer
Tile layout planning happens before install day: choosing the starting point and centering the pattern on the room's focal wall, dry-laying tile to preview cuts, balancing sliver cuts on opposite edges, and aligning grout lines across floor and wall. Skip this step and even a well-chosen tile ends up looking like an amateur, uneven job.
Key takeaways
- Layout planning is the physical process of positioning tile before it's set — a separate question from which pattern to pick or which tile to buy.
- This Old House recommends starting from perpendicular reference lines at the center of the room, then dry-laying tile outward from that point before any adhesive goes down.
- A cut narrower than half a tile at an edge is the classic sign of a starting point chosen too casually — shifting the reference line by half a tile fixes it before it happens.
- Grout lines should read as continuous where a floor meets a wall, or where two planes meet — a decision made with chalk lines on paper, not discovered after the fact.
- This guide is deliberately narrow: pattern choice, execution mistakes, and the full tile decision framework each have their own dedicated guide, linked below.
This is about positioning tile, not choosing it
Three other guides on this site answer three related but different questions: bathroom tile pattern ideas covers which pattern to pick, how to choose bathroom tile walks through the full role-durability-format-finish-grout decision framework, and bathroom tile mistakes is a broader execution checklist covering everything from movement joints to slip ratings. This guide is narrower than all three: once you know which tile and pattern you're using, this is specifically about the physical planning that happens before a single tile is set — where the layout starts, how it's centered, how cuts are balanced, and how grout lines carry across the room.
Skipping this step is how a beautifully chosen tile still ends up looking like an afterthought — a thin sliver cut against the most visible wall, or grout lines that jump where the floor meets the shower wall. None of that is about the tile itself. It's entirely about the planning that should have happened first.
The four decisions, in order
Starting point → dry-lay → balance the cuts → align the grout lines. Each step depends on the one before it, which is why skipping ahead to "just start tiling" is where layout problems begin.
Step 1: Choose the starting point and reference lines
Every tile layout begins with a decision that has nothing to do with the tile itself: where does the pattern start? This Old House's own tile-setting guidance lays out the standard method: "For a floor installation, start by creating two perpendicular reference lines that intersect at the center of the room." Those chalk lines, snapped floor-to-wall and verified square with a 3-4-5 triangle check, become the fixed grid everything else is measured against.
Starting in a corner and simply working outward — skipping the reference-line step — is the single most common way a layout goes wrong before a single tile is even cut. Whatever falls at the far wall falls there by accident, not by design.
Step 2: Dry-lay before anything is set
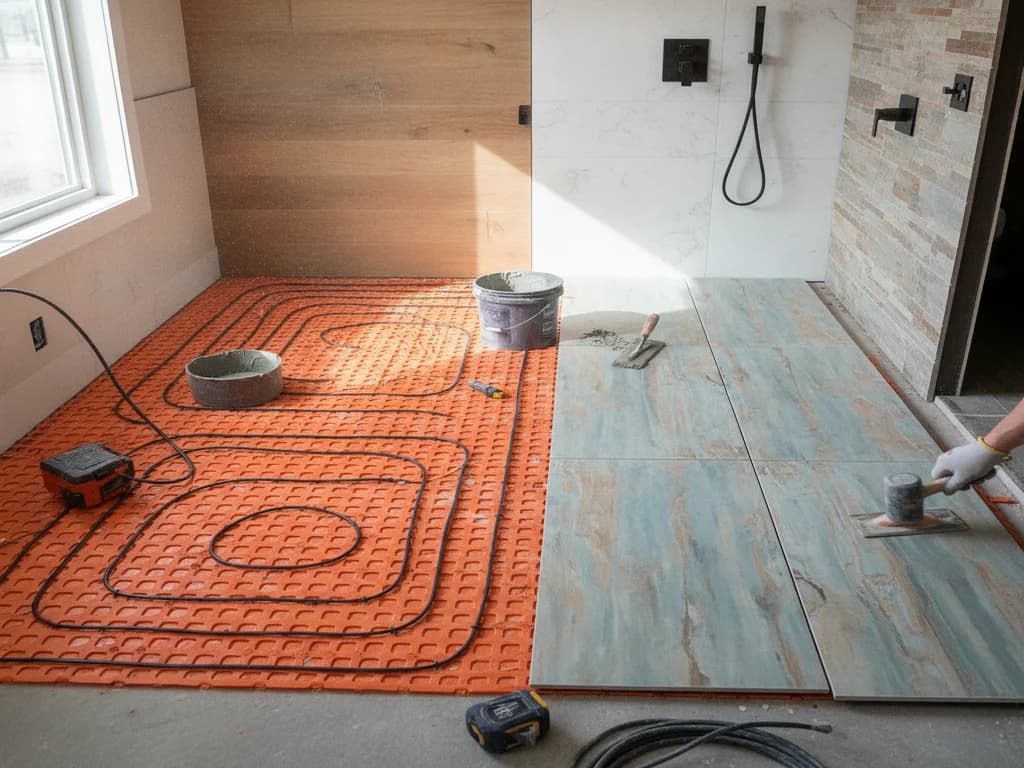
Once the reference lines are down, the tile itself gets laid out — without adhesive — to preview exactly how it will land. This Old House is specific about the sequence: "Do a dry layout on the floor: start at the point where the two reference lines intersect and move out to the walls." This is the step that turns an abstract plan into something you can actually look at and adjust before it's permanent.
A dry-lay is also the moment to check a pattern against real conditions in the room — a door swing, a fixed vanity location, a window — that a plan on paper can miss. It costs an afternoon. Skipping it costs a re-tile.
Step 3: Balance the cuts so nothing lands as a sliver
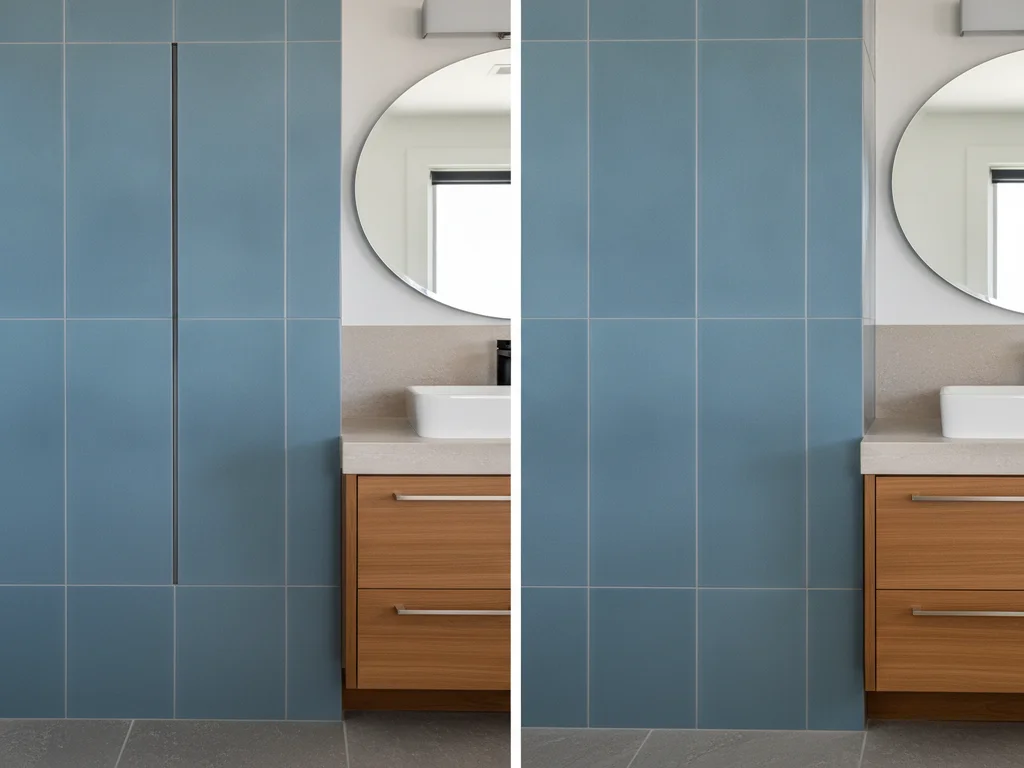
The dry-lay is also where you catch the problem that shows up most visibly on a finished job: a cut tile narrower than half its own width at an edge. This Old House's guidance addresses it directly: "If you're going to be using less than half a tile or mosaic sheet along an edge, shift the chalk line that runs parallel to that wall by half a tile." That single adjustment — made on paper, before the reference lines are finalized — is the difference between a floor with balanced, intentional-looking cuts on both sides and one with an obvious sliver against the most visible wall.
This is also where centering on a focal point earns its keep. A layout centered on the vanity, the tub, or the room's main sightline — rather than started arbitrarily at whichever wall is nearest the door — reads as considered rather than incidental. The National Kitchen & Bath Association's planning guidance treats this as a fundamentals issue: agree on the layout origin and focal point before any thinset is mixed, not after.
| Step | What it decides | Sign it was skipped |
|---|---|---|
| Reference lines | Where the pattern starts and whether it's square | Grout lines that drift or aren't parallel to walls |
| Dry-lay | How the pattern actually looks before it's permanent | Surprises discovered after thinset is already down |
| Balance the cuts | Cut width at every edge | A sliver cut under half a tile at a focal wall |
| Align the grout lines | Continuity between floor and wall, or across a room | Joints that jump where two planes meet |
Step 4: Align grout lines across floor and wall
The last planning decision is whether grout lines carry through where two surfaces meet — floor to wall, or one wall to an adjoining one. When those joints line up, a bathroom reads as calm and custom-built; when they jump, even good tile looks careless. This is decided on paper alongside the reference lines, not discovered by eye once the wall tile is already up.
Joint width itself is part of this decision too. This Old House's tile-setting guidance is specific about the standard for a clean, considered job: "The tighter the grout joints, the better the tile job looks," with a preference for joints "as small as 1/32 of an inch" on rectified tile — a spacing decision that has to be set before layout, since it changes how many tiles fit across a given wall or floor.
Where this fits with the rest of your tile decisions
Layout planning is one piece of a larger set of decisions. If you haven't chosen a pattern yet, start with bathroom tile pattern ideas — herringbone, hexagon, large-format, and more, each with a "best for" verdict. If you're still working through tile material and durability class, how to choose bathroom tile walks through that decision in order: role, durability, format, finish, then grout. And once tile is going in, bathroom tile mistakes covers the execution details beyond layout — movement joints, slip resistance, and substrate — that determine whether the job lasts.
This guide sits between those three: it assumes the tile and pattern are already chosen, and focuses entirely on the physical planning that determines whether the installation looks intentional or accidental.
The bottom line
Four decisions, made in order, before a single tile is permanently set: pick the starting point with real reference lines, dry-lay the pattern to preview it, balance the cuts so nothing lands as a thin sliver, and plan for grout lines to carry through where surfaces meet. None of this requires a different tile or a bigger budget — it requires planning the layout on paper before it becomes permanent on the wall.
A custom tile and stonework installation is where pattern choice, layout planning, and correct execution come together in one project.
Ready to plan your Boise bathroom?
Licensed & insured · 3-year workmanship warranty
Frequently asked questions
- What is a tile dry layout and why does it matter?
- A dry layout is placing tile — without adhesive — exactly as it will be set, to preview cuts and spacing before anything is permanent. This Old House recommends starting it at the center reference point and working outward to the walls, since it's the step that catches sliver cuts and pattern problems while they're still easy to fix.
- How do you avoid a thin sliver of tile at the wall?
- Plan the reference lines so no edge cut is less than half a tile wide. This Old House's guidance is direct: if an edge would land under half a tile, shift the parallel chalk line by half a tile before setting anything — a planning-stage fix, not something to solve after cutting begins.
- Should floor and wall tile grout lines line up?
- Yes, wherever the two surfaces meet or are visually adjacent — continuous grout lines read as a calm, intentional design, while misaligned ones draw the eye to the seam. This is decided during layout planning, alongside the reference lines, not adjusted after the wall tile is already installed.
Sources
- This Old House — Tile Setting 101: Best Practices from an Expert
- American Olean — Tile Pattern Layouts: A Guide to Classic & Creative Designs (manufacturer)
- Tile Council of North America — installation standards
- National Kitchen & Bath Association — bathroom planning guidelines
- TCNA — Handbook for Ceramic, Glass & Stone Tile Installation
Claims and figures are drawn from the sources above and provided for general guidance; your project may vary. Photography is illustrative of design concepts. For a fixed price on your specific bathroom, request a free estimate.