
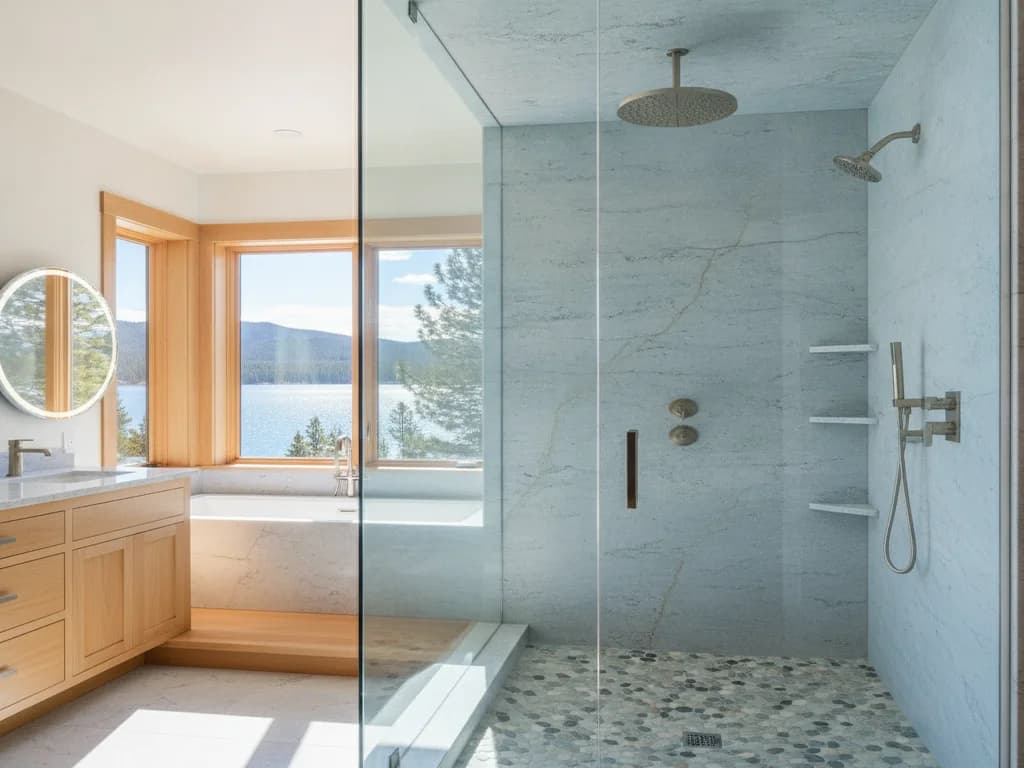
Custom Tile & Stonework
Tile and stone are where a bathroom earns its character. We set everything over properly waterproofed substrates, with the layout planned and dry-laid first — from large-format porcelain to mosaic accents and natural stone — so the finished work lasts as long as it looks good.
What's included
Custom Tile & Stonework
- Floor, wall, and full shower-surround tile
- Natural stone and large-format porcelain
- Mosaic accents, niches, and feature walls
- Proper waterproofing and crack-isolation systems
- Precise layout dry-laid before installation
How it works
Our custom tile & stonework process
The right choice for homeowners who want the tile and stone itself to be the standout feature — intricate patterns, slab walls, mosaic accents, or natural stone set to last, not just installed quickly.
- 1
Select & Layout
We help choose materials — large-format porcelain, natural stone, mosaics, or a mix — and plan the pattern, grout lines, and focal points. Sightlines and transitions are mapped before anything is cut.
- 2
Substrate & Waterproofing
We prepare a flat, sound substrate and apply waterproofing and crack-isolation systems where they're needed. This hidden layer is what lets the finished surface survive moisture and movement.
- 3
Dry-Lay
Before setting anything in mortar, we dry-lay the layout to balance the pattern, position accents, and avoid awkward slivers at edges and corners. Adjustments happen here, while changes are still easy.
- 4
Set & Grout
Tile and stone are set with proper coverage and consistent spacing, then grouted, sealed where appropriate, and finished at the edges. We clean haze and review the finished work surface by surface.
Choosing the material: porcelain, ceramic, natural stone, and glass
The material sets the whole tone of a tile job, and the four families that show up most in a bathroom each behave differently. Porcelain is a dense, low-absorption ceramic — the Tile Council of North America classifies porcelain as having a water absorption of 0.5 percent or less, which is what makes it the workhorse for wet floors and shower walls. Standard ceramic is a bit softer and more absorbent, excellent on walls and lighter-duty floors where its wider color and glaze range earns its place.
Natural stone — marble, travertine, quartzite, slate, limestone — brings veining and depth no manufactured tile fully copies, but the Natural Stone Institute is clear that most stone is porous and needs sealing and gentler care. Glass tile, used mostly as mosaic accents and feature bands, is impervious and luminous but demands a flatter substrate and the right setting material so it reads clean rather than blotchy. We help weigh look against upkeep so the material matches how hard the surface will actually work.
- Porcelain — densest and most water-resistant; the default for shower floors and heavy-traffic bathroom floors
- Ceramic — softer, more absorbent, huge glaze range; ideal on walls and lighter-duty floors
- Natural stone — unmatched character, but porous and sealing-dependent per the Natural Stone Institute
- Glass — impervious and reflective, best as accents; needs a flat substrate and matched setting materials
Match the material to the surface, not just the mood board
A polished marble that looks stunning on a vanity wall can be a poor pick for a shower floor, where slip resistance and constant moisture matter more. We sort selections by where they land — floor, wall, or accent — so nothing beautiful ends up in a spot it will not hold up in. Our best floor tile for bathrooms and best shower wall materials guides break the choices down surface by surface.
Patterns and layout: where a tile job becomes design
Two installers can set the same tile and get very different rooms, because layout is where craft lives. A straight stacked grid reads calm and modern; a running-bond offset (the classic subway brick pattern) hides minor size variation and feels traditional; herringbone and chevron add motion and make a small floor feel intentional; a large-format grid on a shower wall minimizes grout lines for a near-seamless, slab-like look. Vertical stacks stretch a low ceiling, and a diagonal set can make a narrow room feel wider.
The layout decisions that matter most happen before any thinset is mixed. We establish control lines off the room, not off a wall that may be out of square, so the pattern stays true across the whole surface. We plan where cut tiles land — pushed to less visible edges instead of flanking the vanity or centered under the showerhead — and we size the field so you are not left with a sliver at a corner. Accent bands, niches, and transitions get positioned to fall on a full-tile module wherever possible. This is exactly what the dry-lay stage in our process is protecting, and it is the difference between an installed surface and a designed one.
Waterproofing under the tile: the layer you never see
Tile and grout are not waterproof — this is the single most misunderstood thing about a tiled shower. Grout is cementitious and porous, and water passes through it and through the tile joints to the layer beneath. That is why the waterproofing membrane behind and below the tile, not the tile itself, is what actually keeps a shower dry. The TCNA Handbook builds every wet-area assembly around a continuous, bonded waterproofing or vapor layer, and a job that skips or shortcuts it will look perfect for a year or two and then telegraph failure through the ceiling below.
There are two proven approaches we use: a bonded sheet membrane such as a Schluter-type system, and a liquid-applied membrane such as a RedGard-type coating, both installed to the manufacturer's specification and the TCNA method for that assembly. Corners, the curb, drain, and every change of plane are the failure points, so those transitions get reinforced and detailed, not just rolled over. Which system fits a given shower depends on the substrate and layout — our shower waterproofing guide and the Schluter vs. RedGard comparison lay out the trade-offs. On floors, a crack-isolation membrane over the right underlayment does the parallel job of keeping substrate movement from reaching the tile.
Grout: the choice that decides how the job ages
Grout is a small line item that has an outsized effect on how a tile job looks in five years. Standard cement grout is the traditional choice — workable, repairable, and available in a wide color range — but it is porous, so it needs periodic sealing and can stain or darken over time, especially on a shower floor. Epoxy grout is denser, effectively stain-proof, and does not need sealing, which makes it a strong pick for wet, high-use, and hard-to-clean areas; it costs more and sets faster, so it is more demanding to install cleanly. Our epoxy vs. cement grout guide walks the full comparison.
Grout width and color are design decisions as much as technical ones. A tight joint reads seamless and modern but demands very flat tile and precise setting; a wider joint is more forgiving and traditional. Color choice shifts the whole look — a grout matched to the tile makes the field disappear into one surface, while a contrasting grout deliberately draws the pattern and every line. We pick joint width to the tile's rectification and the layout, and confirm grout color against the actual tile in the room's light rather than off a sample board.
| Factor | Cement grout | Epoxy grout |
|---|---|---|
| Porosity / staining | Porous; can stain, needs sealing | Non-porous; effectively stain-proof |
| Sealing required | Yes, periodically | No |
| Best use | Walls, general areas, easy repairs | Shower floors, wet & high-use zones |
| Install difficulty | Forgiving, widely workable | Faster set, less forgiving |
| Relative cost | Lower material cost | Higher material + labor |
General material behavior; specific products and warranties vary by manufacturer.
Maintenance and sealing: keeping stone and grout looking new
How much upkeep a tiled surface asks for is set the day the material is chosen, not later. Glazed porcelain and ceramic are essentially maintenance-free beyond routine cleaning — no sealing, just a pH-neutral cleaner and a rinse. Natural stone is a different commitment: the Natural Stone Institute recommends sealing most stone with a penetrating (impregnating) sealer and using stone-safe, non-acidic cleaners, because acidic products like vinegar or many bathroom cleaners will etch marble, travertine, and limestone regardless of sealing. A sealer slows absorption and buys time to wipe spills; it does not make stone bulletproof.
Cement grout benefits from a periodic sealer for the same reason — to resist staining in the joints, which is where a shower floor tends to show wear first. Epoxy grout sidesteps that step entirely. Across all of it, the daily habits that matter most are simple: squeegee or wipe down a shower after use, run the exhaust fan to pull moisture out, and avoid abrasive pads on polished stone. We hand off the specific care routine for the exact materials in your room so the finish you paid for keeps looking the way it did on day one.
What drives the cost of custom tile and stonework
Custom tile pricing is driven less by the square footage than by the complexity of doing it right, and understanding the levers helps a budget go where it counts. Material is the obvious one — a basic ceramic and a book-matched natural stone slab are worlds apart — but the bigger swings come from labor. Small-format tile, mosaics, herringbone and other pattern layouts, and lots of cuts around niches, benches, and curbs all mean more setting time than a simple large-format grid. Natural stone adds handling, sealing, and often more careful cutting than porcelain.
The hidden work drives cost too: substrate prep to get walls and floors flat and sound, the waterproofing assembly, crack-isolation on floors, and any structural or plumbing correction found once surfaces are opened. Because these variables move so much, no honest number comes from a formula — it comes from the actual scope. For realistic ranges tied to Idaho projects, see our natural stone vs. porcelain comparison for the material side, and request a free estimate for a scoped price on your specific room rather than a guess.
- Material — ceramic vs. porcelain vs. natural stone vs. slab, and grade within each
- Layout complexity — pattern work, small formats, and mosaics add setting labor
- Cut count — niches, benches, curbs, and edges multiply the careful cutting
- Substrate prep and waterproofing — flat, sound, sealed surfaces are labor, not filler
- What is found on demo — hidden water damage or dated plumbing changes scope
Good to know
Custom Tile & Stonework questions
- Why is the dry-lay step worth the extra time?
- Dry-laying the tile before setting it lets us balance the pattern across the wall or floor and avoid thin, awkward cuts landing in the most visible spots. It's far cheaper to move a tile during a dry run than to chip out a set one, and it's the difference between an installed surface and a designed one.
- Is natural stone or large-format porcelain more durable in a wet area?
- Both perform well when installed correctly, but they behave differently — porcelain is highly water-resistant and low-maintenance, while natural stone is more porous and needs periodic sealing. The right pick depends on the look you want and how much upkeep you're comfortable with, and we'll walk through the trade-offs.
- What is crack-isolation and why does it matter under tile?
- Crack-isolation is a membrane that separates the tile from minor movement in the surface beneath it, so a small shift in the substrate doesn't telegraph up as a cracked tile or grout line. Combined with proper waterproofing, it's a big part of why a well-built tile installation stays intact for years.
- How long does grout and tile last before it needs redoing?
- A tile installation set over proper waterproofing and a sound substrate can last decades — the tile itself far outlives most other finishes in a bathroom. What typically needs attention first is the grout and any caulk at changes of plane, which can be cleaned, resealed, or spot-repaired long before the tile is a problem. The failures that force an early redo almost always trace back to skipped waterproofing or a bad substrate, not the tile wearing out, which is why we spend the time on the layers underneath.
- Can you tile over an existing tile floor or wall?
- Sometimes, but it is a case-by-case call rather than a shortcut we default to. The existing surface has to be fully bonded, flat, and sound, with no hollow or cracked areas, and the added height at thresholds and fixtures has to work. In a wet area we almost always recommend removing the old tile so we can inspect and rebuild the waterproofing correctly, because tiling over a shower with unknown or failed waterproofing just hides the risk. We assess the specific surface before recommending either path.
- Do you seal natural stone, and how often does it need resealing?
- Yes — we seal natural stone with a penetrating sealer as part of the install, following Natural Stone Institute guidance, because most stone is porous. How often it needs resealing depends on the stone and how the surface is used: a simple water-drop test tells you when it is time — if water stops beading and starts darkening the stone, it is due. We hand off the specific care and resealing routine for the exact stone in your room so it stays protected without guesswork.
Custom Tile & Stonework by city
Serving Boise & the Treasure Valley
Guides & ideas
Planning your custom tile & stonework project
Request a free estimate
Ready to start your custom tile & stonework bathroom project?
Tell us a little about your space and we'll follow up to schedule a free, no-obligation design consultation with clear, fixed pricing.
Prefer to talk? Call (208) 775-8999

Ready to Transform Your Bathroom?
A fixed-price quote, a 3-year workmanship warranty, and a project manager who answers the phone. Let's build a space you'll love for years.
No obligation · Licensed & insured (RCE-6681702) · 3-year workmanship warranty