Updated July 17, 2026 · 9 min read
By Boise Bath — bathroom & shower remodeling in Boise & the Treasure Valley
The short answer
Bathroom underlayment depends on the finish. Tile needs a rigid, dimensionally stable base over a plywood subfloor that meets L/360 deflection — cement backer board, an uncoupling membrane like Schluter Ditra, or a liquid membrane. LVP and sheet vinyl ride on a smooth, flat, dry subfloor and usually need no separate underlayment beyond leveling.
Key takeaways
- The subfloor, not the finish, is where most bathroom floor failures start — a bouncy or damp base cracks tile grout and telegraphs bumps through vinyl.
- Tile floors require an L/360 deflection limit and are set over cement backer board, an uncoupling membrane (Schluter Ditra), or a liquid-applied membrane — never bare plywood or OSB.
- Cement backer board adds crack resistance but is not waterproof on its own; an uncoupling membrane manages movement and moisture in one layer, per TCNA and Schluter guidance.
- Exterior-grade plywood is the preferred structural subfloor under tile; OSB is common under vinyl but is more sensitive to moisture and swelling at the edges.
- LVP and sheet vinyl ride on a smooth, flat, dry subfloor and generally need no separate underlayment — flatness and moisture control matter more than a cushion layer.
- The wet zone in front of a tub or shower is where a liquid waterproofing membrane earns its place, tying the floor into the shower waterproofing system.
Why the layers under the floor decide everything
When a bathroom floor fails, the finish usually gets the blame — a cracked tile, a lifting vinyl seam, a grout line that keeps splitting. But the real cause is almost always below the surface. A bathroom floor is a stack of layers: the joists, the structural subfloor, an underlayment or membrane, the setting bed, and finally the tile, plank, or sheet you see. Get the lower layers wrong and no finish, however expensive, survives long.
Two forces drive most failures. The first is movement — floors flex underfoot, and a rigid finish like tile cannot flex with them, so it cracks. The second is moisture, which a bathroom produces every day and which finds every unsealed seam and swelling panel edge. The right underlayment is the layer that answers both: it stiffens and stabilizes the floor while keeping water where it belongs.
That is why underlayment is not a one-size decision. Tile, luxury vinyl plank, and sheet vinyl each ask for a different base, and the wet zone in front of a tub or shower asks for more than the dry field does. In Treasure Valley homes the problem is often an aging builder-grade subfloor — 90s and 2000s construction where a garden tub sat on a floor never built for today's heavier tile. Understanding the layers is how you decide what to keep and what to rebuild.
The subfloor: plywood vs OSB
The structural subfloor is the sheet material nailed to the joists — the layer that carries the load. In North American homes it is either plywood or oriented strand board (OSB). Both are engineered wood panels rated for subfloor use, but they behave differently when a bathroom is involved.
Exterior-grade plywood is the preferred base under tile. Its cross-laminated plies give it dimensional stability, it holds fasteners well, and it tolerates the occasional wetting that happens near a tub better than OSB does. The Tile Council of North America recognizes plywood as the standard wood subfloor for ceramic and stone tile installations.
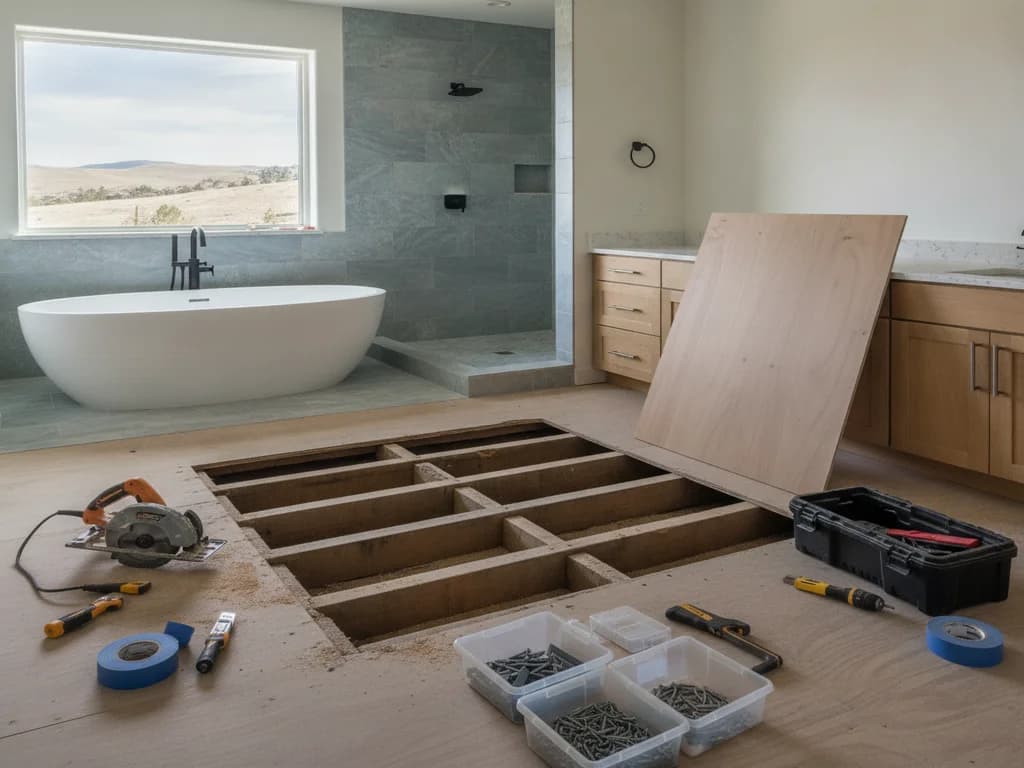
OSB is common, cheaper, and structurally strong, but it is more sensitive to moisture: once water penetrates a cut or unsealed edge, OSB can swell and stay swollen, leaving a permanent bump that telegraphs through any finish. It is a reasonable base under LVP and sheet vinyl where it stays dry, but under tile it demands extra care and an uncoupling or backer layer above it. A professional inspects the existing subfloor first — soft spots, delamination, or swelling near the tub often mean part of it is being replaced before anything new goes down.
Deflection and the L/360 rule
Deflection is the amount a floor flexes under load, and it is the single number that governs whether a tile floor lasts. The industry standard for ceramic and porcelain tile is L/360: the floor may deflect no more than its span divided by 360 under load. For natural stone the bar is stricter — L/720 — because stone is even less forgiving of movement.
What this means in practice is that the joists and subfloor together have to be stiff enough. A floor that feels bouncy when you walk across it will crack tile no matter what membrane sits on top, because no underlayment can fix inadequate structure below it. This is a common trap in older Treasure Valley homes where joists were sized for vinyl or carpet, not for a mortar-set porcelain floor.
A professional evaluates the joist span, spacing, and subfloor thickness against the L/360 (or L/720) requirement before selecting an underlayment. Sometimes the fix is adding a layer of plywood to stiffen the deck; sometimes it is sistering joists. The membrane conversation only makes sense once the structure passes — underlayment manages the remaining small movements, not a structurally deficient floor.
No membrane fixes a bouncy floor
Uncoupling membranes and backer boards manage the minor in-plane movement between subfloor and tile. They do not add stiffness. If the floor fails the L/360 deflection test, the structure has to be corrected first — otherwise the tile cracks regardless of what goes under it.
Underlayment for tile: backer board vs uncoupling membrane vs liquid
Once the structure is sound, tile still cannot be bonded directly to plywood — wood and tile expand and move at different rates, and the tile loses. Something has to sit between them. There are three mainstream approaches, and each solves the problem a different way.
Cement backer board is the traditional choice: a rigid panel of cement and reinforcing mesh, screwed and thin-set to the subfloor to give tile a stable, non-shrinking base. It resists crumbling when wet, but it is important to understand that backer board is not itself waterproof — water passes through it, so in wet areas it is paired with a separate membrane.
An uncoupling membrane — Schluter Ditra is the best-known — is a thin polyethylene sheet with a keyed underside that bonds to the subfloor and a gridded top that anchors the tile. Its job is right there in the name: it uncouples the tile layer from the subfloor so that when the wood moves, the tile does not have to. Many uncoupling membranes also provide waterproofing and vapor management in one layer, which is why they have become the default in modern bathroom tile work, per Schluter and TCNA guidance.
A liquid-applied membrane — a paint- or trowel-on product like RedGard or LATICRETE's liquid systems — is a coating that cures into a continuous waterproof film over backer board or a suitable substrate. It shines in the wet zone and around the shower, where it ties the floor into the shower waterproofing system as one continuous barrier. It is often used together with backer board rather than instead of it — the board for stability, the liquid for waterproofing.
The comparison table
The table below lines up the three tile underlayment systems against the two variables that matter — crack isolation and waterproofing — plus where each fits. Treat it as a starting point; the right choice depends on the specific subfloor, the tile, and how wet the zone is.
| System | Crack isolation | Waterproofing | Best for |
|---|---|---|---|
| Cement backer board | Good (rigid, stable base) | No — needs a separate membrane | Dry floor field; pairs with liquid membrane in wet zones |
| Uncoupling membrane (Ditra) | Excellent (decouples tile from subfloor) | Yes — most versions waterproof + vapor-manage | Modern all-around bathroom tile floors |
| Liquid membrane (RedGard/LATICRETE) | Limited on its own | Excellent (continuous film) | Wet zone and shower tie-in; over backer board |
| Bare plywood / OSB | None | None | Never a direct tile substrate |
General guidance drawn from TCNA installation methods and manufacturer literature (Schluter, LATICRETE/RedGard). A professional selects and details the system for the specific floor.
What goes under LVP and sheet vinyl
Resilient floors change the conversation completely. Luxury vinyl plank (LVP) and sheet vinyl are flexible, so they do not fear the small movements that crack tile — which means they generally need no crack-isolation membrane and no backer board. What they need instead is a subfloor that is smooth, flat, and dry.
Flatness is the governing requirement. Most rigid-core LVP tolerates only a small variation over a set span, and any ridge, gap, or high spot in the subfloor will eventually telegraph through the plank or, worse, cause clicked seams to separate. A professional flattens the subfloor with a patching or self-leveling compound rather than adding a cushioned underlayment. Many LVP products include an attached pad, and stacking a second foam layer under a rigid-core floor can actually make it feel spongy and stress the joints — the manufacturer's instructions decide whether any separate underlayment is allowed at all.
Sheet vinyl is even more demanding about smoothness because it is thin: it reads every imperfection below it. It is typically installed over a smooth luated-plywood underlayment panel or a skim-coated subfloor. For a fuller look at how the resilient options behave over time, our guide to replacing bathroom flooring covers the finish side of the decision, and the pros and cons of LVP in bathrooms digs into moisture behavior.
The wet zone and heated floors
Not all of a bathroom floor is equal. The field of the room stays mostly dry; the zone in front of the tub or shower gets splashed daily, and the shower itself is saturated. Underlayment strategy should follow that reality. In the wet zone a waterproof membrane — uncoupling or liquid — is not optional, and it should be lapped and sealed so it becomes continuous with the shower's waterproofing rather than stopping at an unsealed edge where water can sneak underneath.
Heated floors add another layer to plan for. Electric radiant mats or cables sit within or just under the setting bed, and they interact with the underlayment: some uncoupling membranes are designed specifically to embed heating cable, while other systems layer the heat above backer board. The sequence and the membrane choice change when heat is involved, which our heated bathroom floor guide walks through. Whatever the layer, confirming the tile and setting materials are rated to run warm is part of the professional's job — and picking a durable finish starts with the best floor tile for bathrooms.
What the process looks like
- 1
Inspect the existing subfloor
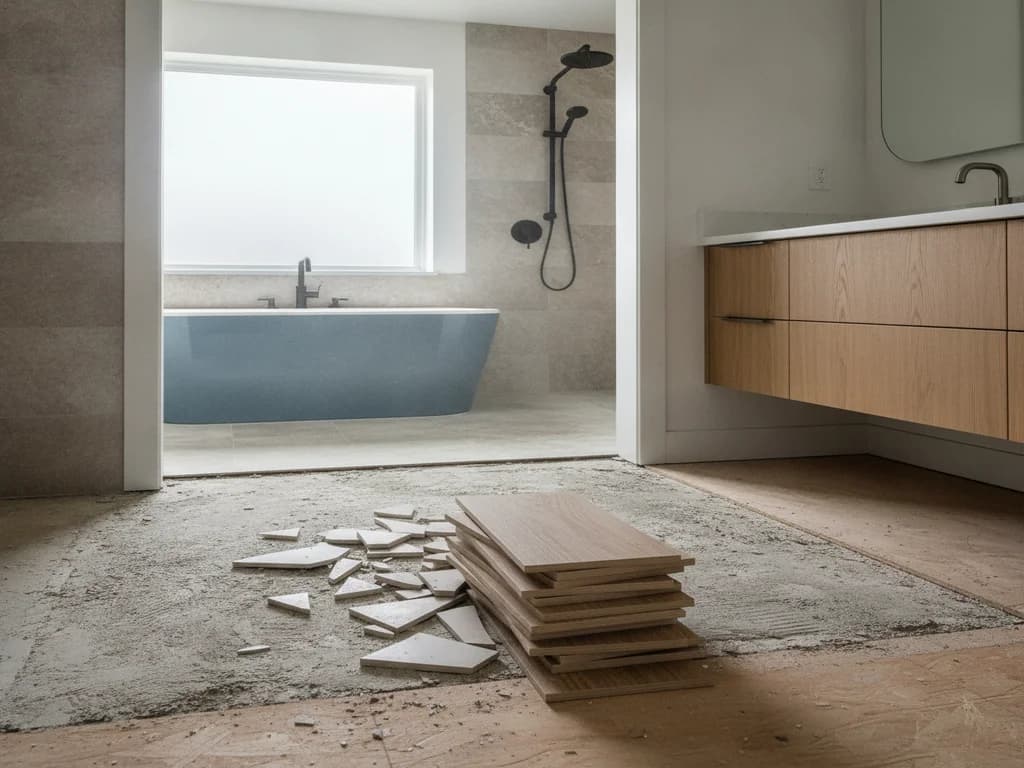
A professional pulls the old finish and checks the subfloor for soft spots, delamination, swelling near the tub, and fastener condition. Damaged or water-swollen sheeting is replaced before anything new is built up.
- 2
Verify deflection against L/360
The joist span, spacing, and subfloor thickness are checked against the L/360 tile standard (L/720 for stone). If the floor flexes too much, structure is stiffened first — no membrane substitutes for a sound deck.
- 3
Flatten and prepare the substrate
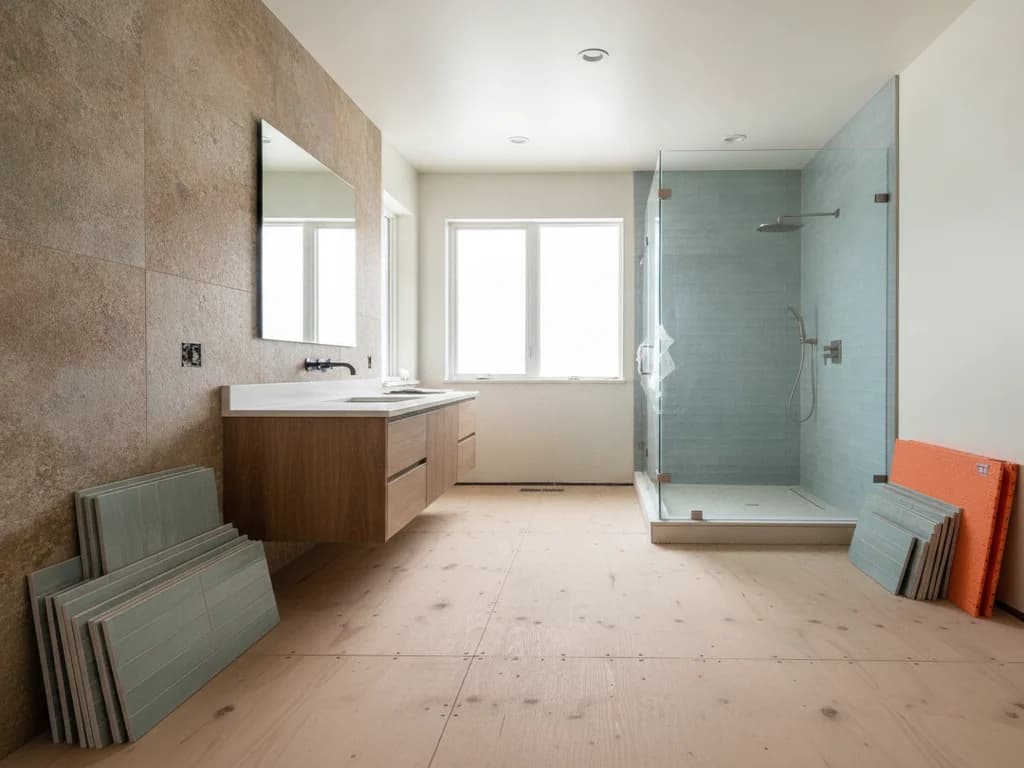
The subfloor is cleaned, high spots ground down, and low spots filled with patch or self-leveling compound so the base is flat within the finish's tolerance — the step that most affects how LVP and sheet vinyl perform.
- 4
Select the underlayment for the finish
For tile, the professional chooses backer board, an uncoupling membrane, or a liquid membrane based on the substrate and wet exposure. For resilient floors, they confirm whether any underlayment is allowed by the manufacturer.
- 5
Waterproof the wet zone continuously
In the splash zone and shower, the membrane is lapped and sealed into the shower waterproofing so the barrier is continuous. Seams and transitions are detailed so water cannot travel under the finish.
- 6
Set the finish and transitions
Tile is set in the appropriate mortar over the chosen membrane; resilient plank or sheet is laid over the flattened base. Thresholds and transitions to adjacent rooms are detailed so nothing lifts at the edges.
Ready to plan your Boise bathroom?
Licensed & insured · 3-year workmanship warranty
Frequently asked questions
- Do I need cement board under bathroom tile?
- Not necessarily — you need a stable, dimensionally sound layer between the plywood subfloor and the tile, and cement backer board is one way to provide it. An uncoupling membrane like Schluter Ditra is another, and it also handles waterproofing. What you cannot do is bond tile directly to bare plywood or OSB, because the wood and tile move at different rates and crack the finish.
- What is the difference between backer board and Ditra?
- Cement backer board is a rigid panel that gives tile a stable, non-shrinking base but is not waterproof on its own. Schluter Ditra is a thin uncoupling membrane that separates the tile from the subfloor so movement does not crack it, and most versions also waterproof and manage vapor in the same layer. Ditra is thinner and does both jobs; backer board often pairs with a separate liquid membrane in wet areas.
- Can I put LVP over my existing bathroom subfloor?
- Often yes, if the subfloor is smooth, flat, dry, and structurally sound. Luxury vinyl plank is flexible, so it needs no crack-isolation membrane, but it does require flatness — ridges and gaps telegraph through and can pop clicked seams. A professional flattens the subfloor with patch or leveling compound first and follows the manufacturer's rules on whether any separate underlayment is permitted.
- Is OSB okay as a bathroom subfloor?
- OSB is structurally strong and common under vinyl, but it is more moisture-sensitive than plywood: once water reaches a cut or unsealed edge, it can swell permanently and leave a bump. Under tile, exterior-grade plywood is the preferred subfloor per TCNA guidance. OSB can work under resilient floors that stay dry, but near a tub or shower it warrants extra waterproofing care.
- What is L/360 and why does it matter for my floor?
- L/360 is the tile industry's deflection limit — the floor may flex no more than its span divided by 360 under load, and natural stone is stricter at L/720. It matters because tile cannot flex; a bouncy floor cracks grout and tile no matter what underlayment sits on top. If a floor fails this test, the structure must be stiffened before tiling.
- Do I need waterproofing under a bathroom floor or just the shower?
- The shower always needs continuous waterproofing. For the rest of the floor, the wet zone in front of the tub or shower benefits from a waterproof membrane sealed into the shower system, while the dry field is more about crack isolation. A professional extends and laps the membrane so the wet areas are protected as one continuous barrier rather than stopping at an open seam.
Sources
Claims and figures are drawn from the sources above and provided for general guidance; your project may vary. Photography is illustrative of design concepts. For a fixed price on your specific bathroom, request a free estimate.